 k2k audio
 This guide walks you through the Player mode’s main logic and flow. It’s not a parameter reference — the goal is to get the mental model right so the Player stops feeling like “a spaceship full of buttons” and starts feeling like a place you can actually compose in.
For deeper reference on individual surfaces, see the Player Reference.
The big picture
Player mode is a sample-based step sequencer with a hierarchy. Everything flows top-down:
SlotBank → Pad → Track → Steps → Substeps ↑ Grid automation sits on the Track, writes to Steps, overrides Substeps.Read that diagram like a chain of ownership:
- A SlotBank holds your sounds.
- A Pad is a slot brought to life with playback parameters.
- A Track sequences a Pad across time.
- Steps are the cells on the Track’s timeline.
- Substeps are subdivisions inside a Step.
- Grid automation is the Track’s way of drawing parameter values over time — it lives at the Step level.
If you keep that top-down flow in mind, every gesture in the Player becomes predictable.
Where things live in the UI
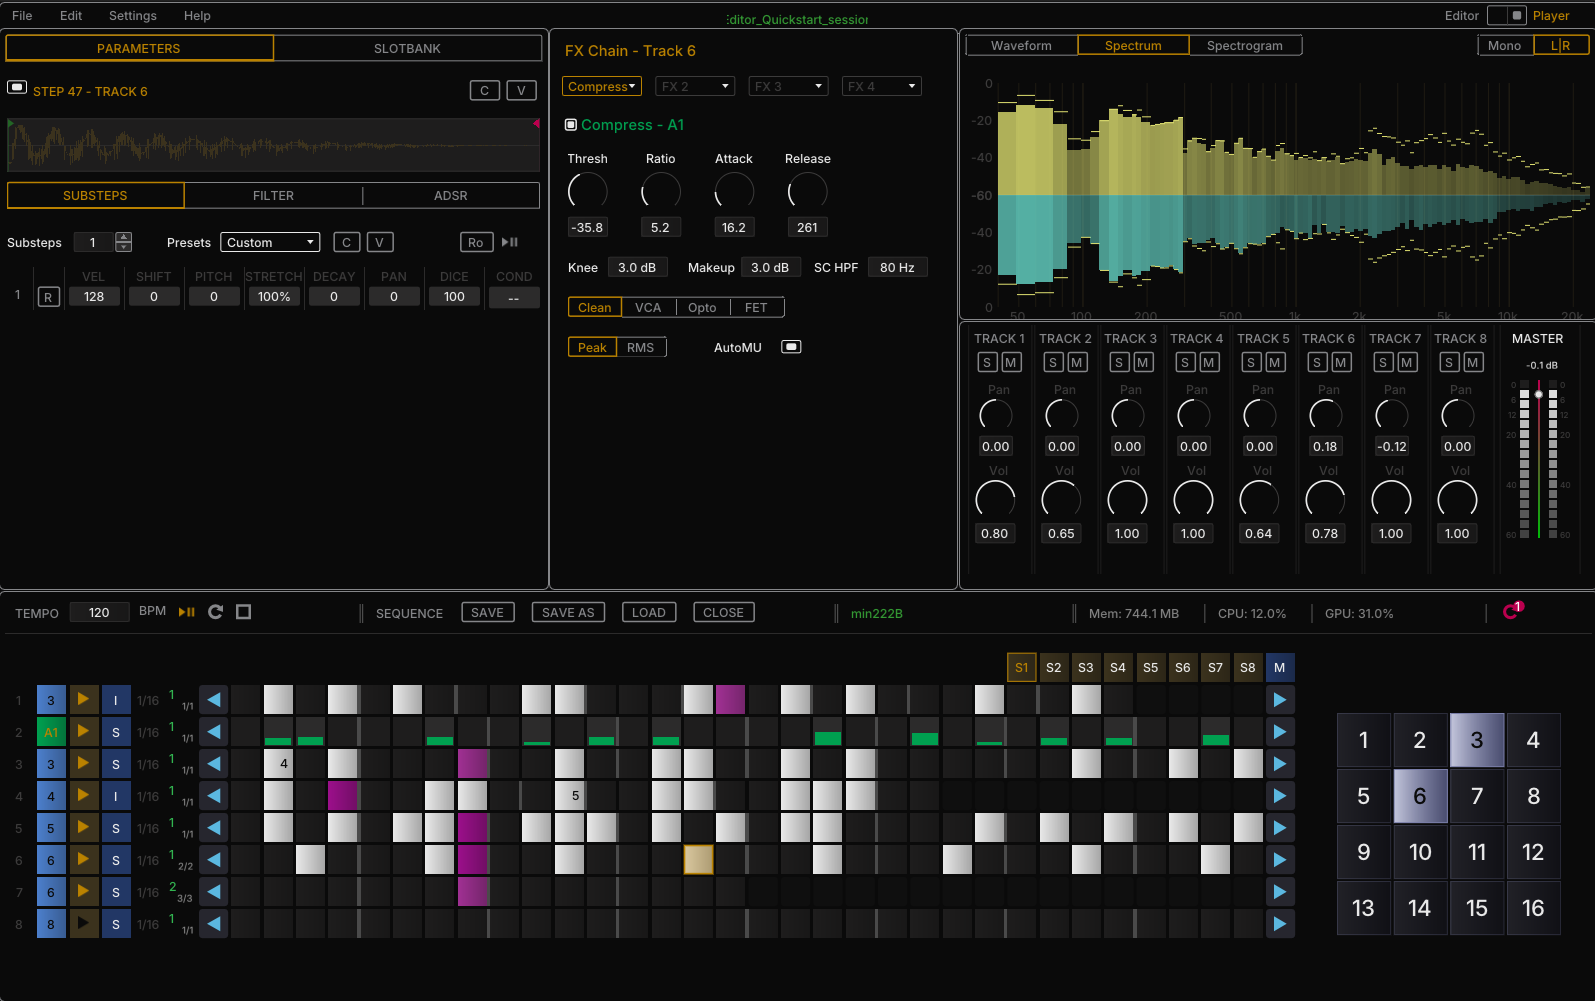
The Player reuses the Editor’s layout logic: one Parameter Panel exposes everything (except FX chains, which have their own panel — see Panels).
The Parameter Panel has two tabs — PARAMETERS and SLOT BANK:
| PARAMETERS tab | SLOT BANK tab |
|---|---|
 |  |
- PARAMETERS tab — shows the parameters for whatever you right-clicked last (a Pad, a Step, a substep, etc.). See Parameters.
- SLOT BANK tab — shows your library of sounds.
The tabs switch automatically. Right-click a Pad → the panel jumps to PARAMETERS and shows that Pad. Right-click a Step → same thing, but now it’s showing Step parameters. You don’t manage the tabs; they follow your focus.
1. SlotBank — your sample library
What it is: up to 128 slots, saved with the session.
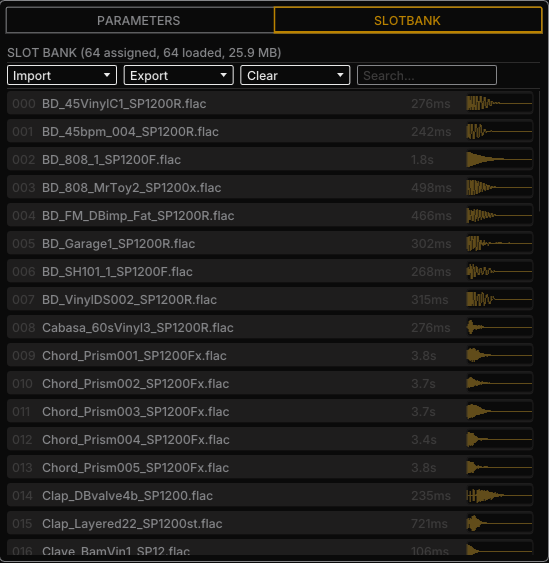
Loading sounds
Drag audio files (or whole folders) into the SLOT BANK tab. K2K resamples every file to the session’s sample rate on import. If the file already matches, import is instant. If it doesn’t, resampling takes some time — dragging a folder of 44.1 kHz files into a 48 kHz session will make K2K think for a while. That’s normal.
Exporting for faster reloads
Once your SlotBank is populated, you can export it — this writes the already-resampled slots to a folder on disk. Then remove the current SlotBank and re-import that exported folder: subsequent sessions load directly from the resampled files instead of re-processing the originals.
Think of it as baking your library: first load is slow, every subsequent load is fast.
Assigning a slot to a Pad
Drag a slot from the SLOT BANK tab and drop it on a Pad. That’s the whole assignment mechanic. The Pad now plays that slot when triggered.
2. Pad — a slot you can play
A Pad is a slot + a set of default playback parameters (pitch, amp envelope, filter, etc.). It’s the first layer where your sound becomes musical rather than just audio data.
Interacting with a Pad
| Gesture | Result |
|---|---|
| L-click | Plays the Pad — instant audition |
| R-click | Opens the Pad’s parameters in the PARAMETERS tab |
| Drag to a Track | Assigns the Pad to the Track — drop on the Track’s leftmost cell (the assignment cell, not a Step cell, at the very left edge). The assigned Pad number appears in that cell. |
Why this matters
The Pad is where you sculpt the default voice. Tune the sample, shape its envelope, set the filter — once. When you drop that Pad on a Track, its parameters propagate as the default for every Step on that Track. Individual Steps can override them, but until they do, they inherit from the Pad.
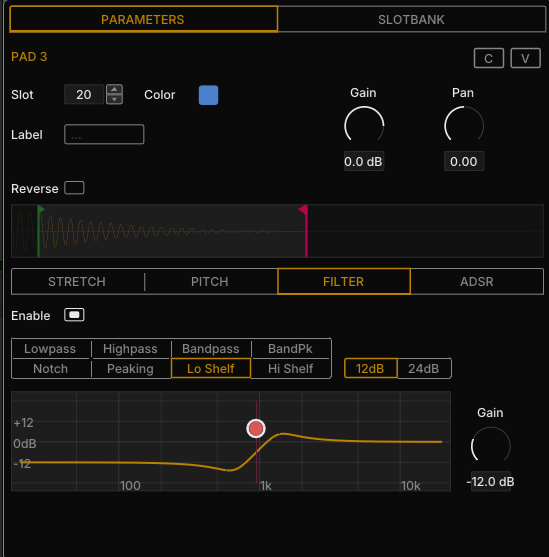
This is the big time-saver: set up your Pad once, then build patterns without re-editing each Step.
3. Track — sequencing a Pad over time
A Track is a horizontal row of Steps. Drop a Pad into the leftmost cell and the Track is live. (Pad assignment can also be edited later from the Track’s Parameters tab.)
Basic gestures
- L-click the Track’s group handle (its left-side label area — the green group number) — opens Track-level parameters in the Parameter Panel and exposes the Track’s FX chain.
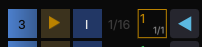
Track-level features worth knowing early
Polyrhythmic / measure patterns. Tracks don’t have to share the same length. One Track can run 7 steps while another runs 16, and they phase against each other — classic polyrhythm territory. Each Track has its own pattern length, and the pattern propagates across the whole group (up to the full page).
Pattern and loop. Take a 32-step page filled with 4-step measures. Setting Pattern = 4, Loop = 8 makes the pattern repeat every 4 steps and the page loop 8 times. For polyrhythms, a pattern like [3, 5, 2] can be combined with a loop of 4 (32 steps total) or 3 (24 steps total), depending on how you want the cycle to resolve.
Euclidean generator. Instead of manually toggling Steps, tell the Track to “distribute N hits across M steps as evenly as possible” and let it populate the pattern. Great for getting unexpected rhythmic shapes quickly. Tweak from there.
Sync. This is the Track-level feature that most rewards understanding early. Sync determines how this Track’s clock relates to the transport and to other Tracks:
- Follow the global transport one-to-one, or
- Run at a divided/multiplied rate, or
- Free-run and re-sync at pattern boundaries, or
- Act as Master / Slave relative to another master Track.
Sync also governs what happens when you hit a Track’s individual Track Play while the main transport is already running — whether the Track locks in immediately, waits for a boundary, or runs free.
Sync is what lets polyrhythmic Tracks actually feel locked instead of drifting. When something sounds “off” rhythmically in the Player, Sync is usually the first place to check.
FX Panel. Each Track has its own FX chain (4 slots — same architecture as the Editor’s bus effects). This is the one Parameter Panel exception: FX chains have their own dedicated panel, not the shared PARAMETERS tab.
4. Steps — the cells on a Track
Steps are where your pattern actually lives. Each cell on a Track is a Step.
Basic gestures
| Gesture | Result |
|---|---|
| L-click a cell | Toggle the Step active/inactive |
| R-click a cell | Open that Step’s parameters in the Parameter Panel |
How Steps inherit
By default, every Step inherits the parent Pad’s parameters. When you R-click a Step and change something, you’re overriding that parameter for that Step only. Un-edited parameters keep following the Pad. Every parameter can be overridden per-Step — including Trim.
This inheritance is the core of “set the Pad once, vary only what needs to vary.”
5. Substeps — subdivisions inside a Step
Any Step can be subdivided into substeps. Substeps are micro-events inside the Step’s time slot — Elektron-style ratcheting, or arbitrary divisions of your choice.
What substeps can carry
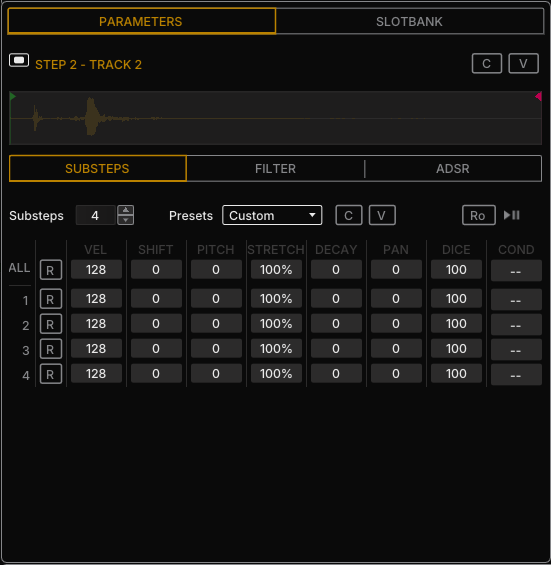
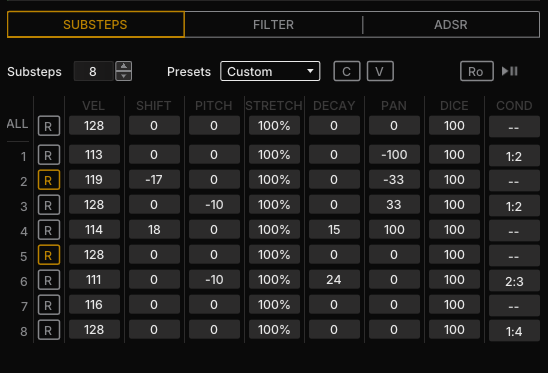
Each substep has its own set of parameters, distinct from the parent Step: Velocity, Time Shift, Pitch, Pan, Decay, Dice, Condition.
(Dice = probability, Condition = trigger-conditional logic.)
Visual indicator
When a Step contains substeps, its cell shows a number — the substep count. A plain cell is a single-hit Step; a cell showing “4” is a Step subdivided into four substeps.
Where you edit them
R-click the Step → the Parameter Panel shows the substep widget, where you edit each substep’s parameters individually.
6. Grid automation — drawing parameters over time
This is the feature that turns the Player from a sequencer into an instrument. And it’s also the feature with the most specific rule about how it interacts with Steps and substeps. The full reference is in Automation.
What it is
A grid automation lane sits on the Track and lets you draw parameter values across the Track’s Steps — using cell sliders (each Step’s cell has a slider that sets the parameter value for that Step). Think of it as a tiny per-parameter envelope baked into the Track’s grid.
Automation can control pitch, velocity, filter cutoff — anything exposed at Track level. The A1–A4 grid-automation toggles are dedicated to the Wet/Dry of the Track’s four FX-chain slots.
The rule: grid automation works at the Step level
Grid automation writes to Steps, not to substeps. When you set a value in the grid automation’s cell slider, that value applies to the whole Step.
Here’s the consequence, and it’s important:
If you’ve already customized a substep’s parameter individually in the substep widget, and you then change that same parameter in the grid automation, the grid automation wins — its value propagates to all substeps in that Step, wiping your per-substep edits for that parameter.
In other words: substep parameters are your fine detail; grid automation is your broad stroke. Broad strokes paint over fine detail. If you want per-substep variation to survive, don’t touch that parameter in the grid automation.
Grid automation can also create subdivisions
You can use grid automation to subdivide a Step (turn it into a substep group). When grid automation creates substeps this way, all generated substeps inherit the parent Step’s parameters as their starting point — same inheritance rule as everywhere else in the Player.
From there, you can R-click the Step and tweak individual substeps in the substep widget. Just remember the rule above: touching the grid automation again on that parameter will overwrite your substep edits.
Basic gestures
| Gesture | Result |
|---|---|
| L-drag a cell slider | Set value for that Step |
| Shift + L-drag a cell slider | Apply the drag to all active cells of the Track at once |
| Ctrl + L-drag a cell slider | Fine / precision drag |
| Ctrl + Shift + L-drag a cell slider | Precision drag applied to all active cells |
| Double-click a cell slider | Reset that cell to its default value |
| Shift + double-click a cell slider | Reset all active cells on the Track |
| Hover the grid-automation selector toggle (top of the sequencer grid) | Previews that parameter’s values across the active Track’s cells |
| R-click the grid-automation selector | Activate / deactivate the cell-slider lane for that parameter |
Multiple grid-automation lanes can be opened and edited simultaneously — enable as many selectors as you need to see the lanes at once.
7. Transport — minimalist on purpose
The transport is intentionally simple:
- Tempo — global BPM
- Play / Pause
- Stop
That’s it. All the rhythmic interest comes from Track Sync, pattern lengths, and automation — not from transport-level tricks.
Putting it together — a typical flow
- Load sounds. Drag a folder into the SLOT BANK tab. Wait for resampling if needed. Export the baked bank if you want fast future loads.
- Assign a slot to a Pad. Drag slot → Pad.
- Shape the Pad. R-click the Pad, dial in the default voice in the PARAMETERS tab.
- Drop the Pad on a Track. Drag to the Track’s leftmost cell.
- Build the pattern. L-click cells to activate Steps. Or use the Euclidean generator for a starting shape.
- Set Track Sync. Make sure the Track’s clock relationship is what you want.
- Add variation. R-click individual Steps to override Pad defaults where needed.
- Subdivide for detail. R-click a Step, add substeps, edit them in the substep widget.
- Draw automation. Use the grid automation lane to move a parameter across the Track. Remember: it overrides substeps.
- Route through FX. Open the Track’s FX Panel, load up to 4 effects.
- Play.
Mental model cheat sheet
- Ownership flows down. SlotBank owns sounds. Pads own defaults. Tracks own patterns. Steps own cells. Substeps own micro-events.
- Inheritance is the default, override is the exception. Change things at the highest level that makes sense; let lower levels inherit.
- Grid automation is broad, substeps are fine. When they collide, broad wins.
- L-click plays or toggles. R-click opens parameters. The Parameter Panel follows whatever you R-clicked last.
- Sync is where polyrhythm comes alive. Set it early per Track.